
Click on the picture for a larger illustration
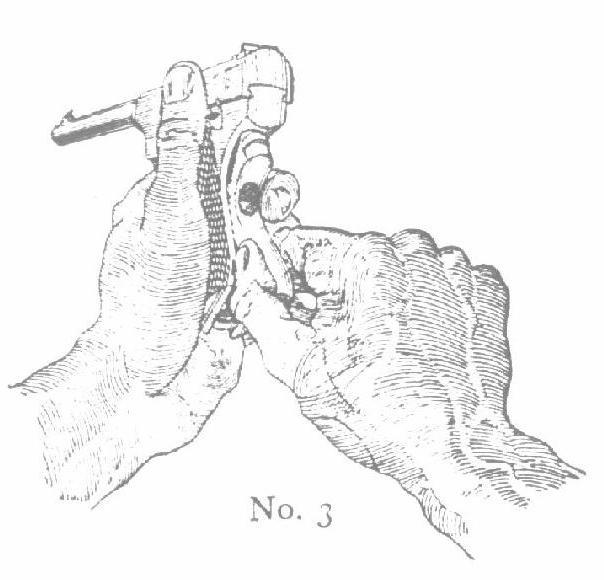
This will release housing from receiver and it may be withdrawn; at the same time magazine catch and sear spring (which are pinned together) are released and can be taken from arm.
Before disassembling your Woodsman...read this
To allow for the extra firm grip some shooters find necessary for accuracy, a main spring housing retainer pin has been installed. Therefore, in disassembling the arm for cleaning, it is necessary to take the following steps before proceeding as outlined under DISASSEMBLY FOR CLEANING:
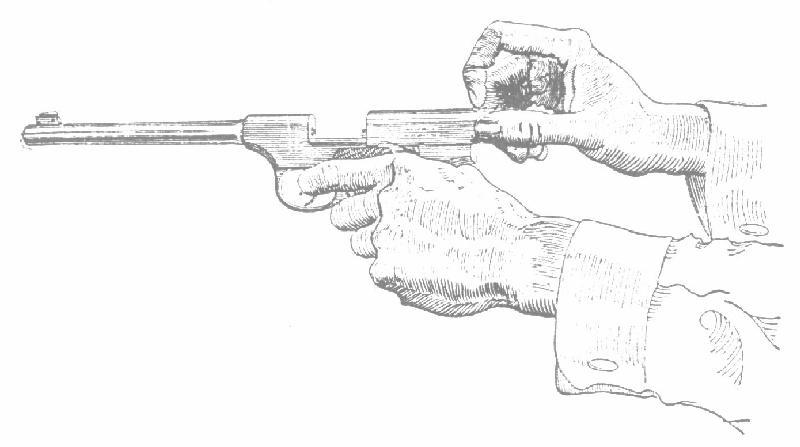
With thumb of right hand press on housing at point where same is knurled;
pressure should be exerted upwards as well as in.
Click on the picture for a larger illustration
This will release housing from receiver and it may be withdrawn; at the same time magazine catch and sear spring (which are pinned together) are released and can be taken from arm.
Slide can now be drawn rearward from receiver.
Place slide on receiver and push forward to closed position. Insert magazine catch and sear spring in position, being sure that lug on magazine catch fits into slot provided for same in handle, sear spring resting on sear and under hammer strut. The hammer must be in forward position with hammer strut resting on sear spring; (pull trigger to insure hammer being fully forward.)
Place top of housing under end of receiver and resting on sear spring.
Click on the picture for a larger illustration
Press on lower end of housing, causing it to snap
into place.
The foregoing is all the dismounting necessary to clean and properly care for the arm.
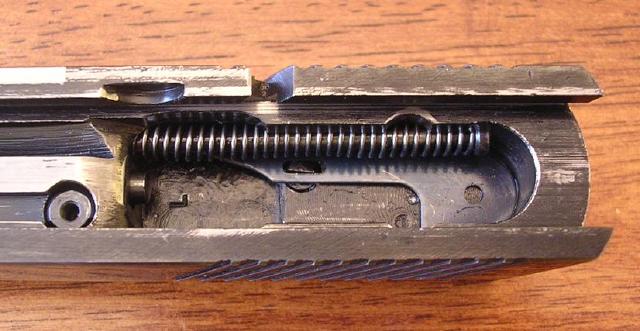
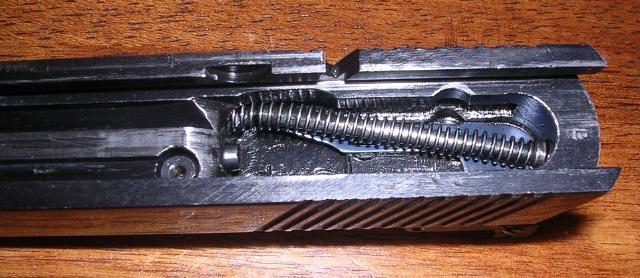
Editor's Note (added): The following NOTE is very important. I have had dozens, perhaps hundreds, of telephone calls, letters, and emails from people who could not put their Woodsman back together, and the cause has almost always been due to the recoil spring having been knocked out of its captured position. The assembly lock is easily jarred loose from the recoil spring guide, thereby allowing the recoil spring to expand to the rear of the slide. To someone who doesn't know what it is supposed to look like, that condition will look perfectly normal, but in fact the pistol cannot be re-assembled until the recoil spring is re-captured by the assembly lock. That is not easy to do, but it can be done with patience, some mechanical aptitude, and a tool with which to compress the recoil spring back into the slide so the assembly lock can be re-engaged in the recoil spring guide. I use a small, flat bladed screwdriver for that tool.
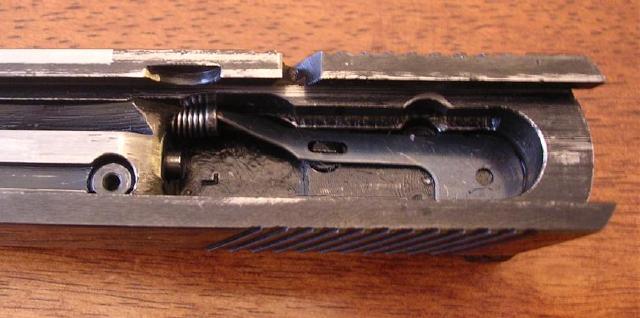
NOTE: If, at any time, during the taking apart or assembling, the recoil spring should jar off from the assembly lock, it should be again pressed into its forward position and held secure by pressing down the assembly lock plunger.
NOTE (Added):
Unfortunately, the wording of the above note from the original Colt instructions is not crystal clear, but it is very important. I have had dozens, perhaps hundreds, of telephone calls, letters, and emails from people who could not put their Woodsman back together, and the cause has almost always been due to the recoil spring having been knocked out of its captured position. The assembly lock is easily jarred loose from the recoil spring guide, thereby allowing the recoil spring to expand to the rear of the slide. To someone who doesn't know what it is supposed to look like, that condition will look perfectly normal, but in fact the pistol cannot be re-assembled until the recoil spring is re-captured by the assembly lock. That is not easy to do, but it can be done with patience, some mechanical aptitude, and a tool with which to compress the recoil spring back into the slide so the assembly lock can be re-engaged in the recoil spring guide. I use a small, flat bladed screwdriver for that tool.
 Back to Assembly/Disassembly